Google Chrome browser with its unique capabilities has shown a lot of improvements over the years no wonder it stands out from the crowd.
Earlier, Google added a feature in its browser, a built-in pop-up blocker which removes pop up from the Chrome browser. Chrome browser is the most used browser in the world and it is spread across all platforms on Windows, macOS, Android, iOS, etc.
Chrome browser provides its users with a lot of control over their data and security but looking back you would understand that great improvements have taken place which among them is the pop-up blocking feature but was kept hidden.
In this article, we will show you how to enable the pop-up blocker on Google Chrome to enable you to have control over those annoying and reluctant pop-up ads. The steps are easy and straightforward.
How to Enable Pop-Up Blocker on Google Chrome
- Launch the Google Chrome on your computer and paste the following address on your URL
chrome://settings/content/popups- Hit the Enter
- The URL address will redirect any pop-up page. Turn it off.
- A Block (recommended) option will be shown as well. This blocks certain websites from showing pop-ups. To enable this, click on the Add Button.
- After adding a website to the block list. You will be shown the lists of sites that have a pop-up. Click on the options to block pop-ups.
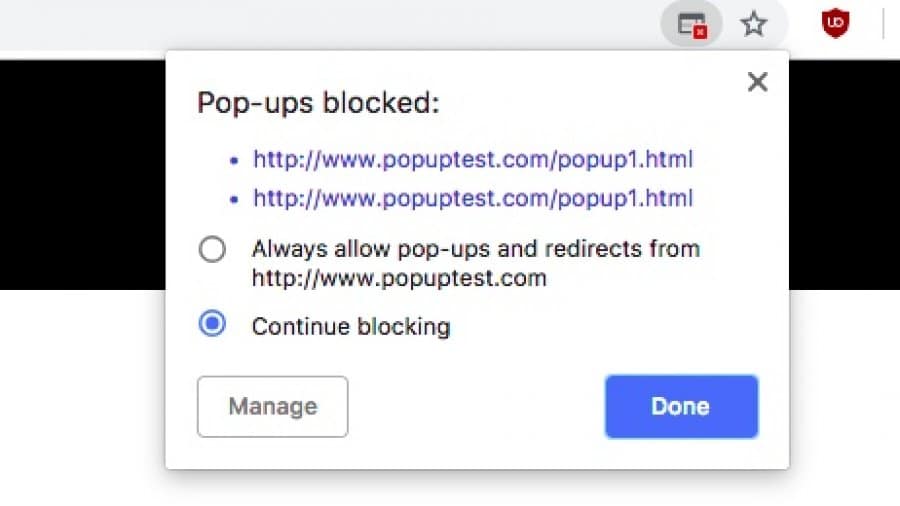
- Click on the icons showing pop up then select ContinueBlocking and you are good to go.
By following the above steps you have enabled Google Chrome Pop-up.
This feature is mainly for Windows 10 users. However, if any site shows a pop-up, check your browser extensions.
Locate and remove the extensions causing the pop-up. Be alert that some pop-ups are created by malicious extensions, search and remove them from the browser.
The steps above are legit steps involved in enabling Google Chrome pop-up blocker and it’s only available for Windows 10 users. Try it out and share your thoughts with us by using the comment section below.


